Showing posts with label Dept. of Quirky. Show all posts

Friday, August 23, 2013

Quirky Roof - Roofing Around

A recent thread at the Revitforum.org asked about this roof form.


Don't worry about the dimensions. I used them to make sure a roof would work if I was "careful". I later messed around with it a bit to see if I could reproduce the error the original poster described, like this.


The other day I was discussing roofs with someone and I brought this situation up. I used the arrow keys to nudge walls around and thought the result was worthy of a quick video to demonstrate how different proportions affect the roof outcome. It's certainly quirky, maybe even "buggy"?


Wednesday, May 29, 2013

Tag Slope of a Ramp

We can apply the Spot Slope annotation to a ramp but it isn't very useful because, while Revit does acknowledge the ramp element, when you attempt to tag it you see [no slope] (image using 2014).


Alfredo replied to my previous post with a tip in his comment:
    If you first place the spot slope tool on a floor and then move the slope annotation to a ramp, it works!

In this image I've dragged a slope annotation from a floor element over to a ramp element and it recognizes the ramp's slope!


Definitely quirky and subtle but at least it is possible after all. A word of caution, it will probably be necessary to check the slope value before printing, for example if Revit regenerates information because the ramp is altered. The tag could could start to report [no slope] again. Fwiw, in my casual testing so far it hasn't broken the slope value even after altering a ramp's parameters. Your mileage may vary...

Sunday, April 7, 2013

New Selection Quirks

Dan Stine passed along a couple thoughts after working with Revit 2014 in earnest. The new selection options Select by Face and Drag Elements on Selection can have some undersireable effects on your modelling experience. He wrote to describe these two situations:

Select by Face combined with Drag Elements on Selection is a “deadly” combination because you can much more easily start moving floors and ceilings.

When Select by Face is turned on you cannot select Rooms or Spaces. Ouch or maybe that's good, depending on what you are up to? I'll have to check to see if we can still TAB over the room tag to select the room.

Sometimes when we get things we ask for we also get some unintended consequences along with them.

Monday, March 11, 2013

Closing Worksets with Specify

When you open a Revit project that uses Worksets there is an option to specify which worksets you want to open before Revit goes to the trouble of fulling opening the project. Very handy for big projects, crucial even.


I have occasionally encountered a situation where Revit won't let me open a project with all the worksets closed at first. Why do that? It is the fastest way to get a project open. Sometimes you need to do something like swap out titleblocks. If you load even some of the actual model it will take longer to open sheet views. If what you are doing doesn't depend on seeing the model in the views it is much faster to close the worksets first and the carry out your work.

When this has happened the Open button gets diasabled. If I open at least one workset it becomes enabled again. Revit seems to really want one workset open at least in some files and for others it doesn't care. No, I have no idea why it is fussy about it.

Saturday, March 9, 2013

Trey Suppress Spaces

Okay this is a follow up to redux. Erik pointed out that we can still override the dimension style to ignore the project settings and Suppress Spaces. Here's what a string of dimensions look like with no overrides in play.


Here's what the same string looks like with overridden dimension style and Suppress Spaces on. Notice that the dimensions are tighter (good) and the prefix and suffix are closer too (not a better look though).


This means that we can still get what I though we lost. It seems the Suppress Spaces option is limited to altering the prefix/suffix while the dimension style needs to be overridden to get it.

Since I can put a space in between the prefix and dimension value, same for suffix, I'd prefer that the style could use the more obvious Suppress Spaces option and let the dimension stay connected to project units. I'd be far more likely to use it that way than ever use it to mess with prefix and suffix which I seldom use in conjunction with a real dimension value either, definitely the exception rather than the rule.

Thursday, March 7, 2013

Suppress Spaces Revisited

In Revit 2012 (wrote about this earlier) we had the ability to shrink imperial dimension values a bit.


The upper dimension shows what 2012 did when Suppress Spaces was checked. The bottom shows unchecked. In 2013 we lose that. In my earlier post I missed/forgot that Ryan responded explaining what changed. Rats, I don't like the change, I want my old suppress spaces back by golly! This is what we get now (using my best Craig Ferguson accent, "It makes littul sense tah meee").


Tuesday, March 5, 2013

These are not the Warnings You are Looking For

Funny message offered in the Review Warnings dialog.


I had previously selected all the room tags in the model (select all instances in entire project) and then chose the option to Move to Room to fix Revit's complaint regarding some of them. The message displayed changed to the above. Nice that it is confirming there are now no more warnings but I find it amusing that it says "Warning...there aren't any warnings, Warning". Proceed with caution.

Tuesday, February 12, 2013

Rotate with Component

This little setting is meant to force a tag to rotate with the tagged element, meaning to maintain the alignment.


The easiest example is beam or wall tags following their parent.


These categories respond to Rotate with Component:
Walls, Curtain Walls, Doors, Windows, Railings, Ramps, Stairs (Runs, Landings and Supports), Structural (Framing, Braces and Trusses), Property Boundary, Property Line Segments, Planting, and Parking.

These categories are immune to Rotate with Component:
Foundations, Floors, Ceilings, Roofs, Furniture, Furniture Systems, Casework, Generic Models, Structural Columns, Detail Components, Massing, Mass Floors, Curtain Panels, and Specialty Equipment.

Breaking loose from "Revity rules" the space, room and area tags are allowed to rotate more easily by choosing Vertical, Horizontal or Model, for each tag we use. The Model option allows us to use the Rotate tool to rotate them freely, which would be quite nice for any tag.

Architectural Columns, Shaft Openings remain immune to tagging by category at all.

That seems like a long list but that doesn't even factor in MEP components. Perhaps I'll tackle that another night.

Monday, January 28, 2013

Tag on Placement Quirk

My friend Tom wrote to me the other day asking if he was crazy or if I could confirm that Revit 2013 has a quirk when placing a light fixture in a ceiling plan. Well he isn't crazy, at least not about that. It isn't just for light fixtures either, seems to be for any component. When placing a component in a floor plan view you get this ribbon configuration, or close to it.


When in a ceiling plan you get this version...sans "Tag on Placement".


Seems unfair to me. There was a recent Hotfix posted for Revit 2013 but it does not appear to address this issue. I demand equal opportunity for Tag on Placement!

Thursday, December 13, 2012

Paste Aligned Won't Play Along

I recently encountered a situation where two Paste Aligned options did not work while the option for "Aligned to Same Place" did. In this situation I was moving elements from one building file to another because of a scope of work switcheroo.


Typical we can select elements in a linked file and then paste them into the host project. Ordinarily I can paste walls, for example, using "to Aligned to Selected Levels" or "Aligned to Current View". In this case the walls didn't seem to remember their level arrangement even though both models observe the same elevations and naming. Revit insisted on putting them on the level above or the level below.

I ran into the same disrespect using "Aligned to Current View". The only way I got what I wanted was using "Aligned to Same Place". I was in a hurry so I didn't back up and try to figure out what might be contributing to the issue. I've never had a problem using the other options with elements that were already part of the same host file, you know just pasting elements to other levels to copy them upward or downward. Maybe it has something to do with the fact that these elements were coming from the linked file?

Something to consider the next time you are copying and pasting elements from one file to another.

Thursday, November 8, 2012

Two Minutes with Constraint Quirkiness

Okay it's a little more than two minutes but less than three. I've been running into a few things lately that I don't recall being an issue in the past. Then again maybe my memory isn't what I thought it was? Take a look at this image. Seems pretty straightforward.


I've got a pair of Reference Planes that I want to keep positioned on either side of a rail (as in stiles and rails for a door). In the past I could do what you see and then use the dimensions on the right to shift the collection of reference planes up or down a bit. Now I find that I can't unless I select all three together. In the past I just grab the one in the middle and use the referencing dimension to shift it up/down. Doing that now gives me some weird results. It's probably better and easier to explain it with a video so here's one at You Tube.


Monday, June 11, 2012

Detail Level Ignored with Unlocked Wall Layers

We can unlock a layer or layers in a wall to allow "pulling" them up or down separately from the rest of a wall. This makes it possible to create a brick veneer that drops below a level some distance or pull the stud layer up farther, like this.


To make this possible you need to edit the wall's structure and select a layer to unlock, like this: 1 - Click Modify, 2 - Select the edge of a layer, 3 - Unlock the padlock

Interestingly, in Ceiling Plan views only, when we take advantage of this we lose the ability to show just two lines with Detail Level: Coarse.

I suppose it makes sense somewhat, since they are now distinctly separate but the hope was that we could still see just two line in Coarse. Seems to work fine in plan views though.

Tuesday, April 24, 2012

Beware the Double Click in Revit 2013

I've seen a post at AUGI now and received a couple emails disparaging the new feature, "Double Click a Family to Edit Family". Cool right? In the example at AUGI it isn't much fun when you click too quickly on your sheet's title block to edit a parameter and you end up opening the family instead. Slow down buckaroo! Click...pause...click

The emails were just asking me if this is supposed to happen, yep...new feature. This one may fall into the "Careful what you ask for." category or maybe the "Seemed like a good idea at the time." department.

Be careful double clicking out there folks.

Tuesday, March 6, 2012

Scheduling Inequity for Ducts

If you examine the properties of a duct you'll see a parameter called "Reference Level". Do the same for a Duct Fitting and you get a parameter called "Level".


If you choose to create a schedule of ducts or duct fittings a fairly obvious way to sort them is by the level or floor they are related to. Oddly enough there is no access to either Reference Level or Level. Some other elements have "Associated Level" offered as a valid schedule field, not ducts or duct fittings...not duct systems either.

Revit has been plagued with seemingly arbitrary restrictions on what can appear in a schedule from the beginning. For ducts I can see where a riser that spans several floors might not have a very meaningful "reference level" value but it does have one, so I think it ought to show up in a schedule. In fact I frequently realize that a duct references the wrong level because I placed it in a 3D view, particularly risers. If that showed up in a schedule I'd have another chance to catch it and adjust it accordingly.

In my over-simplifying opinion, if a Revit element has a parameter value in the properties palette it ought to be able to show up in a schedule too.

Wednesday, February 15, 2012

Keynotes - Files, Tags and Legends

Here are a few quirky "gotcha" items you can encounter when you get serious about using the keynoting tools.

If you apply User Keynotes and then change the number values (the Key Value parameter) for them in your keynote file they don't change in the Revit project to reflect the new numbers, even after you Reload the file. That strikes me as undesirable but I believe I understand why. There is no GUID to keep track of. I'm wrong, actually there is one, it's the Key Value parameter but it isn't effective as one. When you change it...Revit can no longer reference it in the project. In order for Revit to update the Key Value too there would need to be a separate GUID (that we can't change), so it could keep track of them.

When this happens Revit keeps the old value intact. You'll have to select the keynote tag and redirect it to the correct value. You can also type in the correct value in the Properties Palette. Yet another way to manage this issue (in a project) is to have a master User Keynote legend (drafting or legend view). Place an array of a small detail component (not grouped and associated though) and apply each User Keynote to them so you end up with one keynote for each unique one you plan to use throughout the project. This view serves as your master "fixer" view. You can go through them all in this one view and fix any that need to be updated. All the others that have been placed throughout the project will inherit the change...change in one place...changes it everywhere else, phew.
    Does that make sense? How or why would this even happen? Need a practical example? Let's say you create your own keynotes for architectural finishes that use the numbering scheme A200 and there are values that run from A201-225. You apply keynotes to a lot of stuff. During a design review the project manager decides that we should revise our existing A200 series to AW200 (wood finishes) and create a new AM200 series for metal finishes. Never question the pm :)

    When you renumber the A200 series and reload the keynote file into the project the existing numbers in the keynote tags don't change. If you click on the tag and then the keynote value Revit will open the keynote file but it won't expand the list to show it is associated with the correct keynote, you'll have to do that. As I mentioned before you can just select the keynote tag and in the properties palette type in the new value, inserting the new "W" in the number. That will fix it and when you open the keynote file to check it will work correctly. Not a big deal for one or two or ten. Hundreds is another story.
Another item is that keynotes will still show up in a legend (on the sheet) even if the item that has been tagged isn't visible in the view. For example, if you apply a keynote tag to an element and then use Visibility/Graphics to turn that category off, the keynote legend still sees the keynote tag...and it shows up in the list.

Yet another item is that keynote tags that are in Legend Views aren't included (selected) when you use the Select all Instances option In Entire project.


If, for some reason, you decide you want to use that to delete all the keynotes you won't get the ones in Legend views. You'll have to open those views to track down any refugees. If you want to test it out yourself just add some keynotes to elements in the project. Also add a keynote to something in a legend view. Go back to the other project view(s), right click on a keynote tag and use Select all Instances - In Entire Project, then Delete them. Now visit the project browser and try to delete the keynote tag there. You'll get an error message telling you there is still a keynote tag in the project, like this message.


Unsolicited plug, if you do anything with keynotes at all, are you using Steve Faust's Keynote Manager (Revolution Design)? Why not? I really can't imagine spending any time dealing with keynotes without it, seriously.


Seriously nice little application. I should mention it supports multi-user editing and it creates backup files. That saved me and my recent client some heartache a few weeks ago. A quick search of the backups and back in business we were.

Friday, January 27, 2012

Parameter Grouping

Consistency, CONSISTENCY, consistency...

This post is the result of noticing that families that were using a specific group for some parameters were not showing up in the correct group once they were added to a project.

When you create content the names you use for parameters is one thing to worry about. The Group you assign them to is yet another. We don't get much control over how we present parameters to our users, but Groups are one thing we do get some say about. We can even change them without starting over, compared with getting the parameter name or data type wrong.

If you'd like all your content to show the same grouping you'd better be consistent. Then again even if you are you may not get your way though. I should explain myself now?

Here's a parameter called "Mounting Elevation". It's neatly tucked away in the "Construction" group.


    Curious about why I'm using Mounting Elevation when you can clearly see Default Elevation just above it? I can't tag something with the Default Elevation parameter (Data Devices in this situation), it's not among the parameters available in a tag family. I'm using a shared parameter for Mounting Elevation and "connecting the dots" with a formula that is equal to Default Elevation.

I loaded it into a project and all is well. A bit later I notice this. The parameter has wandered into a new group called "Dimensions". Hmmm...


I went back to the beginning, just like Vezzini told Inigo he should. I started with a blank project template and a single family. I added a shared parameter for "Mounting Height" and assigned it to the "Construction" group. Parameter showed up as expected. I went back to the family and tried to change the group to something else. Loaded back into the project, no respect...parameter still located under "Construction". Apparently once the project captured the group, it stuck, even if I change it in the family and reload it.

Next I tried adding a second family that used the same shared parameter but assigned to a different group, no change. Still assigned to the original group. Hmmm... So how did the parameter move?? I started to think that maybe I assigned the parameter to the other group originally and later decided to use "Construction" instead. That was so hours ago, don't really remember now. Just not sure anymore.

Let's mix it up a little with Project Parameters. When you use a shared parameter in your family Revit is kind enough to make them available in schedules without doing anything extra (except for titleblock families, they are a special case). I thought I'd try adding the same parameter to the project and assign it to the group I really wanted. Aaah... the parameter moved to the group I wanted!


If I edit the Project Parameter and change it again it moves to the new group. Well that's consistent at least.


Fire Protection probably isn't the best group to use though eh? My lesson learned from this fun is to think a bit harder about the groups I want to use earlier and to be really sure I'm happy with the setup before putting it in a real project. If I don't I'll either have to live with it or just add the parameter to the project too (which isn't really a hardship even if it isn't technically necessary).

Monday, January 23, 2012

Color Fill Legends Mixing with Stairs and Railings

David Light wrote a post about getting stairs to display better when color fill legends are involved. Then Brian Mackey wrote a post to offer another solution. David's approach involves using a solid fill and matching color to "blend" the color fill and the solid fill colors. Brian's involves using the new "Ghost Surfaces" feature.

To offer my two cents I wrote a comment to David's post after reading his. I mentioned what happens when we use the "Transparent" option for categories in Visibility/Graphics or using Override Graphics in View feature > By Element.

This is what you see on screen (using the "Transparent" option to "Override Graphics in View > By Element")(uh oh):


And this is what you get when you print (oh? okay):


Intrigued because I didn't bother to try the approach Brian suggested, I tried it. Using the "Ghost Surfaces" option to "Override Graphics in View > By Element" you see this on screen (looking good):


This is what you get when you print (oh, not so good):


Tag...you guys are "it"! :)

Tuesday, January 10, 2012

All Capital Letters

Saw a request recently to change the "Grand Total" (title as Revit calls it) that appears at the bottom of Revit schedules from Sentence Case to Upper Case.


My first reaction was to wander down the path of reminiscing why we use upper case in documentation at all. Going back to hand drafting and reducing the number of characters to master for simplicity and consistency sake. Whenever something like this comes up you can go the route of justification/explanation, "Well, here's why Revit does it that way. I know you don't feel better, but at least you know why though?" Alternatively you can just go the route of apologizing, "Nope it doesn't do that, sorry!"

    Something like this request both seems like such a tiny thing to fuss over and still such a tiny thing for the developers to overlook. Why can't we change the "case" of such automagic labeling?? Surely it can't be hard? If we add in localization, making Revit use a different language, there are some examples of where users are stuck with the English text even though the rest of the words on the documentation aren't. I seem to recall the word Scale for the view scale is/was one of those.

If you really want to get your way, you can, not hard...just isn't automatic, you'll have to keep after it. Alter the schedule so it uses the Totals Only option. Then at the bottom of the schedule add a text element that says "GRAND TOTAL". You've got to move this as the schedule expands/contracts. Remember to check it before printing.


Maybe someday they'll make it possible to change these "little things"? Definitely a Dept. of Reviteristic or perhaps Dept. of Quirky or Dept. of Subtle. Heck all three work for me!

[Added: 1/10/2012] Paul Aubin mentions in a follow up POST that we can use a font that only has upper case characters. That's a trick that a few people I'm met or know from the user forums on the "internets" have used. Assuming you can find such a font that is acceptable it might just work. Remember you've got to make any downstream users also have the font.

Monday, January 9, 2012

Revit MEP Space Tag Shows Unoccupied Now

The alternate title I was going to use is, "More Floors Than Revit Wants".

A thread popped up at AUGI recently discussing space tags that were working but aren't now. In this case, the tags being used were made to report the linked file's room name and number instead of showing the space's own name and number. That's a common work around to avoid worrying about what a space's name and number really is.

One reply mentions that they've seen a situation where they have more than one linked file and there are floors in each of them. It's my observation that the multiple floors issue isn't just that there just are multiple floors, it's that usually there are floors that are "inside" the Space. When an architect places "finish" floors on top the structural slab (often in a separate model) they typically place the floor using an offset equal to the material thickness. This puts the floor up/inside the Space.


This seems to reduce the space to a quivering mess.

One thing that fixes it, adjust your level(s) computation height (Instance Property of a Level) so it is equal to the top or slightly above their finish floors. To avoid that, ask them (the team that gave you the file) to set their finish floors so they are not Room Bounding instead. You'll have to wait for the new file though.


Then again, another way is to just use the regular space tag (using space name/number) and the Space Naming Utility extension (free to subscription members) to sync Room names/numbers with Space names/numbers. I'm still amazed that it isn't just built into RME by now.

Friday, December 23, 2011

Unconventional Revit

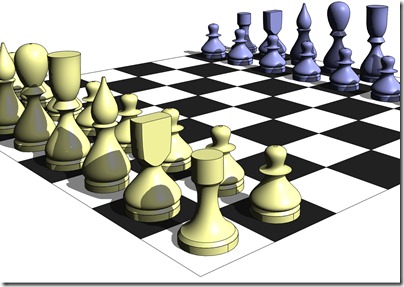
Back in 2005 I wrote about using Revit to choose my son's soccer team lineups. Since then I learned that a friend used it to help her plan the seating for her friend's wedding reception. Now Case Inc. has offered up yet another way to use Revit in unconventional ways, Checkers! Must use worksets though. My mind wanders to four player Battleship? Cool game Case guys!


[Added: 12/29/2011]
Zach Kron "one-upped" the Case boyz with his Chess Set version. Read his Buildz Blog post. Next up Mouse Trap?